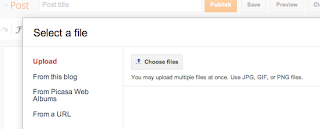
- Click the "New Post" button that appears in the Manage Blogs section. A Create Post page opens.
- Type a title in the "Title" text box, and then type a few words in the text editor that appears below the Title text box.
- Click the "Insert Image" icon that appears at the top of the text editor. A window opens that allows you to add a picture from your computer or add a link to an image on the Web.
- Click the "Browse" button to display a window containing your hard drive's files. Scroll through the files and find an image file you would like to add to your blog post. Double-click that file to select it.
- Click one of the layout choices in the "Choose a Layout" section. The choices are "Left," "Center" and "Right." Choosing one of these options positions your picture in the location you specified. Select "Left," for example, and the picture will appear on the left side of your blog post.
- Click "Small," "Medium" or "Large" to select one of the size options in the Image Size section. The default image size is medium.
- Click the "Terms of Service" check box to place a check mark there and then click "Upload Image." The site shows you a preview of the image. Click "Done" to add it to your post.
- Click "Publish Post," and then click "View Post" to see your post containing your new picture.
Sunday, 14 April 2013
How to Add a Picture on Blogger
Web surfers accustomed to seeing images everywhere on the Internet may consider your blog to be rather dull if it contains no pictures. Text-only pages were fine when the Internet was young, but many bloggers today include music, videos and photos on blog posts. As a Google Blogspot blogger, you have to ability to add flavor to your blog posts using pictures. Blogspot provides two ways to do this.


.jpg)


0 comments :
Post a Comment