Without a divider between your Blogger posts, you may find that your words are becoming a bit jumbled together. Adding a simple divider image to your Blogger template can give your blog a much more polished look. Once you have chosen or designed a divider, you will need to edit the code within your template. Though this edit can be accomplished with a bit of copy-and-paste, this tutorial is recommended for those with basic knowledge of HTML.
- Upload your divider image to your preferred image hosting location. If you do not have your own Web host, there are a number of free online image hosting services.
- Open the "Template" menu within your Blogger dashboard. Select "Edit HTML."
- Click the "Download Full Template" link at the top of the Edit HTML page. This will backup your current template as-is. This way, if you make a mistake in editing the code or decide that you'd rather go back to the original settings, you can upload your backup later.
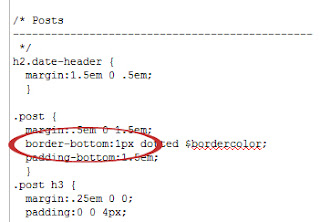
- Locate the "Posts" section within your template's code. Find the following section of code:
.post {
margin:.5em 0 1.5em;
border-bottom:1px dotted $bordercolor;
padding-bottom:1.5em;
}
- Replace the code from step four with the following code. The "URL" value will need to be changed to the full Web address for your divider image. The margin and padding values can be customized as well.
.post {
background: URL(REPLACE THIS TEXT);
background-repeat: no-repeat;
background-position: bottom center;
margin:.5em 0 1.5em;
border-bottom:0px dotted $bordercolor;
padding-bottom:5.5em;
}
The margins and padding values may vary slightly depending on the template you are using.


.jpg)


0 comments :
Post a Comment